Real Men Vacuum

The mud room is loaded with bees. There are clusters on the door and window. A few bees buzz around the room. A few more linger on the honey boxes in the center of the floor.

Even though Beekeeper Man put a bee escape on the hives to minimize the number of bees clinging to the honey boxes, there are always some that remain.

So, Beekeeper Man dons his protective gear in the kitchen and ventures into the mud room to plug in the vacuum. And he vacuums up the bees.

He has a vacuum dedicated for bees.

He also has a vacuum dedicated to man cave messes. He has the obligatory ShopVac, and he is the primary user of the DustBuster.

My husband has more vacuums than I do. It doesn’t mean he vacuums more than I do. He just has more.

I have a single vacuum. It cleans the house. I like it. A lot. My husband may not use it. He will get it dirty.

Eventually, however, all my vacuums get gross and less efficient and/or stop working, and they sit abandoned in a closet until my husband says, “Can I have that?”

I explain how it doesn’t work very well. And then he cleans it all up and it works great.

His vacuums are my rejects.

The Dirt Devil is his bee vacuum. It’s a cheap vacuum that I bought because I was tired of fighting with the large cumbersome Eureka which was clearly designed by a man clueless as to the vacuuming needs of women. The Dirt Devil was not only inexpensive (aka disposable), it is lightweight. But, alas, not really up to the challenge of a whole house. It eventually went to live in the vacuum graveyard—the closet in the guest bedroom.

Until…

One summer day, Beekeeper Man brought honey boxes into the mud room to harvest honey. There were more than a few straggler bees on the boxes and he wanted to use my brand new Shark vacuum to suck them up.

No way!

So I gifted him with the Dirt Devil.

And now he is Dirt Deviling bees in the mud room. Then he will take the canister outside and set them free.

And we will take the honey.

And my vacuum will remain unscathed by honey bees.

And we will remain married.

Installing the New Bees

Our new honeybees arrived this week.

We picked them up Monday evening, having made an appointment for pick-up and advised to arrive with protective gear—not to protect us from the bees, but to protect humans from each other. So, with our corona masks in place and our hands in thin vinyl gloves, we exited the truck. A solitary human stood about twenty feet away and told us to select two boxes from the many that were set up in the yard. We grabbed our two boxes, placed them into the truck (friendly human had disappeared), and drove home.

Safely back home, we took the bees to the bee yard. Since it was now about 8:00 p.m. and dark, we lay the boxes in their spots, checked to make sure the electric fence was turned on, and left them for the night.

Early in the morning Mr. BeeMan visited the bees to unplug the boxes so the bees could come and go. He also took the cleaned and freshly painted hives to the yard and put them in place. We had a narrow window between sunrise and morning rain to install the bees into the hives.

The boxes of bees that we bought are nucs, that is, the nucleus of a hive. Each nuc contains five frames with a laying queen, brood, honey, and lots of worker bees. Those frames are placed into the brood box. Then we add five empty frames to complete the box. The hive has room to grow.

Five frames from the nuc go into the brood box. This frame has capped honey on it.

As we transfer the bees to the brood box, we take a good look. We would love to see the queen, but she is often protected and hidden. In place of seeing the queen, we look for evidence of a queen—brood. In the frames we find honey, capped brood, and uncapped brood. Uncapped brood was most recently laid, so that is a good sign that there is (or very recently was) a laying queen. In subsequent hive inspections we will continue to look for the queen and fresh brood.

You can see the bee larva in the uncapped cells. You can also see that I need a better camera if I’m going to try macro shots like this!

After inserting the frames, Mr. BeeMan closes up the hives. We get this done just as the first drops of rain begin to fall. The bees are tucked in to their new home.

Finally, the lid goes on.

The next day, in a break from the rain, I visited the bees and watched as they circled the hives in orienting flights. Somehow, this sets their internal GPS so they know how to find their way home. It wasn’t long before we began seeing our girls around. They arrived just in time to pollinate our blueberries!

Propolis: Bane of the Beekeeper’s Wife

There are many things that set me off on a rant but the worst ones involve Any Other Person messing up My Stuff. It doesn’t have to technically be my stuff. If I use it and/or clean it, it counts as mine.

Any beekeeper wife will agree that beekeeping presents some challenges with protecting stuff. For instance, you can not melt wax using any pots or utensils you ever again would want to use for food prep. And even then, there are better and not better ways to clean up the wax tools. But the worst offender by far is propolis, the sticky stuff that bees use to seal up nooks, cracks, and crannies in the hive. It is all over the top and bottom edges of the honey boxes. And then it gets on everything else.

And it won’t come off. Clothing, countertops, floor, you name it, if propolis was there it will stick there.

Sunday, our newest junior beekeeper donned the junior-sized bee-suit to watch PopPop BeeMan pull a honey box from Hive 2. His sister stayed back at the house and joined in to watch the honey spin and be bottled. They learned quite a bit about the honey harvesting process.

Seth uses the smoker

They also learned that MomMom does not like to share.

BeeMan had used a bee escape to minimize the number of bees in the honey box. It’s a clever contraption that allows bees to go down to the hive box at night but then they can’t figure out how to get back upstairs. It’s a great way to bring the honey home without a couple thousand accompanying bees. Nevertheless, there were still some bees that made it back to the house with the honey. BeeMan blew off those he could with my new leaf blower but, still, a few made it into the mudroom where we process the honey and they were buzzing around the room.

Checking out the bees on the bee escape

What to do with buzzing bees inside? Vacuum them. BeeMan got the hand vac, but it was not sufficiently charged. So he asked for the vacuum.

Oh. No. Absolutely Not.

I explained to the children that I just bought a wonderful new Shark vacuum and have used it only two weeks. BeeMan may not get sticky bee glop on My Brand New Vacuum.

There is, however, a fully functioning old vacuum in the basement for BeeMan to use for any vacuuming needs he might have. So he sucked up the stray bees who continued to buzz in the dust bin while the children worried for their health.

Fast forward to today. The old vacuum still sits in the mudroom, the captive bees now dead. (Don’t tell the kids.) I have moved on to another project– cleaning out bathroom cabinets in preparation for painting them. I grab the hand vac from the charger. You know, the hand vac that BeeMan didn’t use because it wasn’t fully charged?

He didn’t use it.

He touched it.

The handle is all gooped up with propolis.

Arrrrghhh!

Propolis on My Stuff

But the internet is a wonderful thing. Rusty at Honey Bee Suite discovered that propolis can be removed from a camera with isopropyl alcohol. Well, having just emptied all the contents of the bathroom cabinet, I happen to know that I have isopropyl alcohol (and two bottles of witch hazel and more bottles of lotions, creams, and ointments than I know what to do with). Right at my feet. In one of these eight bags of stuff. Oh, there’s a whole bag of cotton balls, too.

Three cotton balls later, the hand vac is sparkly clean– and sanitized, too. It was super easy. This is great! Now, after we are done harvesting honey, I can use alcohol to de-goop the counters and floor. Despair is lifted. I can return to the bathroom project.

No more propolis!

But first, I better go inspect the leaf blower.

The First of This Year’s Honey: Beating the Bear

We pulled four frames of honey today. They were capped and we are so afraid that the local bear will defeat our electric fence and get to the hives again that we decided to pull some honey as soon as possible.

Those of you familiar with our bear escapades will remember that last year the bear came by three times, knocking the hives over without managing to procure any honey. The bees were pretty traumatized, though, and took out their anxiety on Mr. Beeman, buzzing at him with a ferocity he had never seen.

Beeman, understandably, does not want to lose any honey to this bear.

Early this week, we noticed that one hive had some frames that were capped. Yesterday, Beeman put a bee escape on that hive to prepare for taking the frames. A bee escape is a maze-like board that goes between the top box and the next box down in the hive. At night, the bees go “downstairs” where the queen is. With the bee escape, the bees can go down, but they can’t figure out how to get back up. That leaves the top box relatively bee-free, which makes it a whole lot easier to take the box. Ha! We are smarter than the average bear.

Bee escape

Well, mostly smarter than the average bear. Beeman forgot to plug the electric fence back in after adding the bee escape. He remembered at 3 a.m. Talk about an electric jolt! He jumped out of bed to plug in the cord and then made his way by cellphone light to the bee yard to make sure the hives were still intact. If any bear were in the vicinity, the sight of Beeman in the woods in his underwear at 3 a.m. would have scared him away, for sure!

We spun the frames in our new-last-year electric spinner. It is much more efficient than hand-cranking, although it doesn’t provide quite the same upper arm workout.

Today’s honey is much lighter than last year’s. Last year’s honey had the strong molasses-like taste of tulip poplar. This year, the honey is lighter and more delicate with definite wild berry overtones. No surprise, since we have been picking blueberries by the bucket and tons of wild raspberries are just now ripening. (I just have to figure out how to beat the deer to those berries!)

The air has also been aromatic with wild rose, honeysuckle, and, recently, the oak leaf hydrangea, which is evidently a pollen feast for every pollinator in the area. They have been all over it!

So, 2018 was robust and 2019 is more delicate. Yum to both!

Oops, No Queen: Recombining a Hive

A few weeks ago, in the midst of the spring nectar flow, with queen cells popping up everywhere, BeeMan decided to split a hive using some of the unwanted queen cells. The three other hives, with more room to grow and no longer honey-bound, resumed laying eggs and all is well.

Honey-bound is when the bees are so busy bringing nectar and pollen to the hive that there is no room for baby bees. The solution for the bees is to swarm. BeeMan averted the swarm by adding more boxes with frames and by providing empty frames in the queen box for the queen to lay eggs.. Having no longer a need to swarm, the queen would kill off any pretenders to the throne. And then, she would resume laying.

And that is what happened. The three original hives are busily filling the frames with brood and honey.

The split, however, never managed to produce a queen. BeeMan surmises that the queen cells he gave them were not viable. The queen from the original hive may have stung them before he created new hive. Why does he think this? He had taken a couple of queen cells back to the house and opened them. They were not alive.

Today’s mission in the bee yard was two-fold: recombine the split with its original hive and check to see if honey is ready to be harvested.

Combining the hives was pretty simple. Put the queen-less box on top of the original hive. Ah, but not that simple. The new bees in the original hive will not recognize the bees that had left. To make for a happy transition, a layer of newspaper goes between the two boxes. The bees will get used to their smells as they eat through the paper and become one big family.

And what about the bees who were out foraging when the hives were combined? They come back home to discover that home is not where they left it!

BeeMan says they hopefully will smell their group and find their way to the right hive. I certainly hope so!

As for the honey harvest, one large honey box on the third hive is ready to go! The other two hives have filled out frames but have not capped all the honey cells yet. We plan to go back into the third hive later this week for the first box of honey.

What’s the rush? Usually we wait until the end of July, but with a bear lurking in the area, we want to be sure the honey ends up in our tummies, not his!

Bear print on our property. Photo by Rich DeMarco.

Swarm Season

Tulip poplar blossom

One of our bees on a wild rose

Maywood is in its glory as the May woods blossom with tulip poplars, black locust, and wild roses. The bees have already had their fill of red maple and skunk cabbage and purple dead nettle, a pretty purple-flowering ground cover that brought in bright red pollen.

Yesterday we went in to the bees for the first time in a month and discovered exactly what we found this time a year ago–queen cells, drone cells, capped brood but no larva, and no visible queen.

A year ago, at the beginning of the rainiest year ever in Maryland, the condition of the hives sent us into a near panic. These were brand new nucs. Had we gotten poor queens–again? We did some quick research and managed to avoid two swarms while getting, in the process, a third hive by creating a split with some frames containing queen cells. What the heck, if it didn’t work, we would still have our two hives. But it did work, and the three hives made it not only through the summer, but through the winter, too! This was the first winter in years that we brought all the hives through the winter.

Last year, the rainy weekends kept us from keeping a closer check on the hives. This year it was a combination of rain, cold, and Mother’s Day that kept us away. At our April check, BeeMan put queen excluders and honey boxes on the three hives, happy that the bees had plenty of room to expand.

Hive A, the only hive with its original queen, had been thriving the least of the three. In April we saw the queen (that I had beautifully marked in green last year!) and lots of active laying, but they had done the least to fill up the hive. So, yesterday, we were dismayed to not find her. Hives B and C had lots of baby bees in progress last month, even though we did not see their (as yet unmarked) queens.

Green dot marks last year’s queen

While we inspected Hive A, a queen cell broke as BeeMan pulled out a frame. Out emerged a brand new queen, not that we recognized her at first. She ended up with some other bees in my plastic tub with the burr comb I’m saving. We were almost ready to close up the hive when I got a better look at her.

“Hey, I think this is a queen!”

Sure enough, the young virgin queen with her slender abdomen was wandering around the plastic tub. (Kind of like humans, the women are slender until they get fat with babies and stay that way forever. The queen gets one wild fling a mile up in the air with all the drones she can handle, and then she is just an egg-laying machine, confined to the hive to reproduce for the rest of the life. She doesn’t even get a career.)

The young queen was easy to trap and mark and plop back into the hive. Alas, I still only have the one green marking pen, so both the old queen and the new queen wear green dots. The new queen has a more delicate dot, since I did a better job this year. So, are there two queens in the hive about to fight to the death? Or just the new one? Our next hive check may tell.

Peanut shaped thing hanging off the bottom of the frame is a queen cell

Hive B was very active and full and looking more like it wanted to swarm than to replace a queen. The top box was all honey, so we were assured that the queen was in the bottom box when the excluder went on. BeeMan decided to make a split, taking two frames with queen and brood cells, two frames with honey/nectar, and three empty frames to start a new hive. He will add more empty frames soon. There are still queen cells in the original hives but since we did not see the queen, we were afraid to destroy them. He added another honey box so they have more room.

Hive C was also very active and looking more swarm ready. BeeMan, on a hunch that the queen was probably still in there, got rid of all the queen cells and added another honey box.

The advantage of having several hives is being able to try different things and see what works. We learned a lot last year. Let’s hope that we learned enough!

BeeMan in the bee yard within the bear fence

Les Rûches de Notre Dame and the Prize of Paris Honey: Beekeepers Go to Paris

montmartre

I took this photo because a student bought a painting of it. Came home to realize that I bought the same scene three years ago!

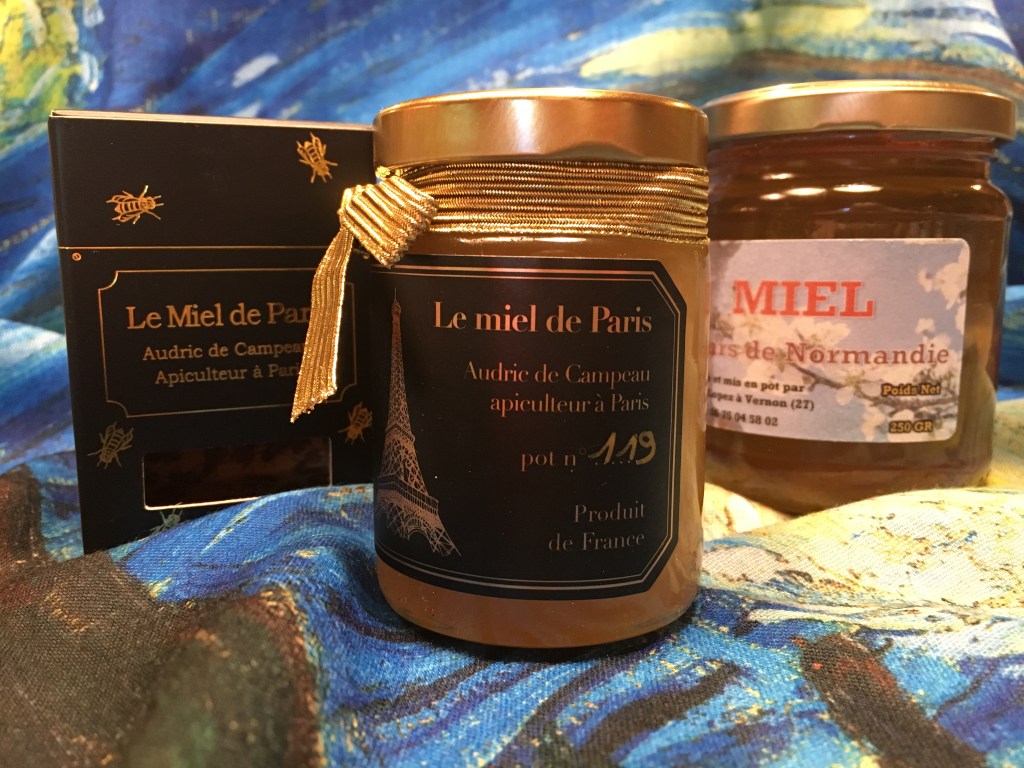
We were dining in Montmartre when the news broke that Notre Dame was on fire. Almost instantly, our phones began dinging with texts from back home. 

“Notre Dame is on fire!”

“Where are you? Are you ok?”

Concern for our well-being came with snarky comments, too: “Was John smoking cigars in the restroom at Notre Dame?”

“We are fine! We did not do it!”

After dinner, we made our way to the steps of Sacre Coeur, the highest point in Paris, where we joined many others in dismay to watch the glow of a historical treasure burning into the night. We stayed up there until 11:00 p.m. to give our group their first glimpse of the twinkling Tour Eiffel, but the Tour Eiffel did not twinkle that night.

Addison Mueller's photo of Notre Dame burning

Notre Dame as seen from the steps at Sacre Coeur. Photo by Addison Mueller, a student on our tour.

Our initial fear for the structure of the cathedral gave way to concern for the bees of Notre Dame.  We knew that three hives were kept on the roof of Notre Dame, but the roof was now gone!  Fortunately, the hives were not kept on the very top of the cathedral (that would be a bit difficult to manage!), but rather, thirty meters lower on roof of the sacristy on the north side of the cathedral.  The sacristy did not burn; however, Notre Dame beekeeper Nicholas Geant had concern for the temperature near the hives. The bees would be doomed by melting wax as much as by flame.https://www.cnn.com/2019/04/19/europe/notre-dame-bees-fire-intl-scli/index.html

Miraculously,  the bees were not harmed by flame, heat, or water.  Drone footage and video by those with access to the roof show the bees zipping hither and yon as usual. (Now the question is when the beekeeper will be permitted to tend to the hives.  Spring is a very busy time for beekeepers as well as bees!) 

The fire at Notre Dame affected, but did not diminish, our trip.  We had planned to attend a Tenebrae service on Holy Thursday.  Instead, we took our group to see the magnificent stained glass at Sainte Chapelle, built in the 13th century to house the Crown of Thorns relic which was rescued from the burning Notre Dame.

Sainte Chapelle

Sainte Chapelle


Streets near Notre Dame were blocked and some metro stops were closed, which made getting to dinner in the Latin Quarter less direct, but we had only one glitch, when our guide had us going the wrong direction on the metro!  Good thing our group knew to follow the listing of metro stops posted on the train!

“Hey, Bibi! Aren’t we going the wrong way?”

“Oh! Yes! We are! Everyone off at the next stop!”  

And just like that, our group of twenty-three hopped off and turned around to go toward the Latin Quarter.  At dinner, our waiter told us of the cinders that fell just outside the restaurant when the spire of Notre Dame crashed in flames.

Our Seine River cruise detoured to avoid making its usual circuit around Notre Dame on Ile St. Louis, but we still got plenty of photos of a now-twinkling Tour Eiffel.

Tour Eiffel with full moon


But amidst all the usual touristy stops, Beekeeper John and Beekeeper Wife Me were in search of honey.  Our first stop, at the Opéra Garnier, yielded nothing.  The honey from the hives on the roof of the Opéra had sold out quickly after last summer’s  harvest.

Opéra Garnier roofline

Opéra Garnier, home of the Phantom of the Opéra and some beehives


We had more success in Giverny at Monet’s Gardens.  John found a sticky jar of Normandy honey in the gift shop. I gave him grief for selecting a sticky jar, but he assured me that all the jars were sticky.  Ah, what a homey touch! (I would have wiped the jars before selling them in a gift shop!)

Monet house & gardens in Giverny

Monet’s home and gardens in Giverny

My coup came at the unlikeliest of places–the Paris Catacombs.  My students had added this to our itinerary and waited patiently–and even happily–in line for three and a half hours–yes, 3.5 hours–to climb down and up over 200 steps to see the bones of 6 million Parisians arranged in artistic patterns.  The drama teacher sang creepy stage songs and multiple students simultaneously played their cellphone recording of another student’s laughter for a frighteningly good creepy atmosphere.

Paris Catacombs

The Catacombs of Paris

We emerged from the Paris underworld and entered the gift shop, which was full of ghoulish humor and plenty of  skulls on tee shirts, mugs, posters, magnets, you name it.  And there it was…Le Miel de Paris!  Paris honey from the beehives of Les Invalides gardens, L’Ecole Militaire, and the Musée D’Orsay.  Sweetness, for sure!  I was even willing to pay eighteen euros for the tiny jar.

Some people wonder why we would buy honey in Giverny and Paris when we have our own honey at home.  It has to do with terroir.  Just as wines vary not just by grape but by the environment in which they are grown, every honey tastes different.  This French-teaching beekeeper wife came home from Paris with three new scarves, four new kitchen magnets, two jars of French honey, and a sigh of relief that the bees still buzz at Notre Dame.

Paris and Normandy honey


This Little Light of Mine: Beeswax Candles

I recently gifted a dear sister-in-law with two homemade beeswax candles.  This has prompted her to do a blog post about beeswax candles.  And that has been a major kick in the pants for me to share my candle adventure here.

Making candles is so easy!  Just melt and pour.

NOT.

It took me over a year to make two lovingly gifted candles.  It took about an hour to make the actual candles but a year of research and development to create the plan.

The Wax

It begins with beeswax.  I could buy beeswax pastilles online, but I wanted to use the wax from our own bees.

But first, I had to purify the beeswax.  Normally, purifying the beeswax takes an evening.  I melt wax  from our hives in a pot of water, and a lovely disk of cool wax is ready for me in the morning. However, I have begun purifying it twice, because the second go-round results in a much cleaner wax.  Cleaning it twice takes longer, but once the wax is clean, it can be stored indefinitely and is ready for making candles and lip balm.  You can see how I clean my beeswax here.

The Candle Recipe

With clean wax ready to use, I needed to decide on a candle recipe.  Pure beeswax candles would be awesome, but I had a limited supply of beeswax.  And until we have more success with  our beehives, that supply will continue to be limited.  So, I chose to blend two parts beeswax to one part coconut oil. I used processed coconut oil because I did not want coconut to compete with the naturally sweet smell of beeswax. For that same reason, I  chose not to add any fragrance to my candles.

The Container

Starting simple, I planned to make votives.  I have more than a bazillion votive holders leftover from three daughters’ weddings.  In addition, my aforementioned dear sister-in-law gifted me with about a hundred Yoplait Oui! jars last Thanksgiving. I do not lack for jars, but which jars would be best for my candles?  I picked the Yoplait jars because I was planning to give some to my sister-in-law who, as you may have guessed, is addicted to Yoplait Oui! yogurt and the cute little jars.  (For her clever ideas, you can visit her blog Now That You Are Home.)

The Wick

The most important factor in producing a good candle was to determine what size wick I needed for the jars.  This is where R&D got serious.  I ordered a sample pack of wicks from CandleScience.com. The Candle Science website had helpful information about choosing the right wick size.  The extremely helpful information said, “It’s hard to give accurate wick recommendations for Beeswax.” But they offered a sampler pack of ECO pre-tabbed wicks to practice with and the advice that beeswax, burning more slowly, will require bigger wicks than paraffin or soy wax do.

So, with a sample pack of wicks and a variety of jars laid out in a grid on a paper bag, I melted the 2/3 beeswax-1/3 coconut oil in a double boiler that is reserved exclusively for playing with wax.  That took about 45 minutes.  Then I poured the hot wax into wicked jars. That part was wicked easy.

The Test Burn

A very important step came next–test burning the candles. If the wick is too big, the candle will burn too fast.  It the wick is too small, the candle will not burn fast enough and the flame could drown in a pool of melted wax.  Another problem with a too-small wick is “tunneling.” Tunneling happens when the wax does not melt to the edges of the container, so the candle melts down into a hole in the center of the jar with wax still along the sides.  The proper size wick should result in a lovely pool of melted wax to the edges of the container after a two hour burn.

We dined by candlelight that night of the test burn.  Although the candles were systematically laid out on the kitchen island in rows labeled by jar and wick size, the science experiment still cast a romantic ambience over the room.

The Results

All did not go as planned.  I ran out of wax before getting to the correct jar with the correct wick size.  All the candles had wicks that were too small.

I melted some of the candles again and tried with the largest wicks in my sample pack.  It seemed to be a tie  between the ECO 12 and the ECO 14 wicks. I decided to go with the ECO 12.

Being an optimist, I ordered 100 wicks. (Add that to the list of things my daughters will be tossing when I’m dead.)

I  made another, smaller,  batch of candles with this year’s wax.  The yield was four Yoplait Oui! jars.

And I think the wick is too small.

And I think that the Yoplait jar is not the best choice for my  candles.  A straight-sided votive would burn better. And I probably should use a smaller jar.  The  4 oz. Yoplait jar is about the same size as a small Yankee tumbler.

Next year, I will try a narrower jar and/or the ECO 14 wick.

But I would also like to try to find the right wick for a pure beeswax burn.

The R&D continues.

Long live the queen

Getting a new hive of honeybees established is exciting but sometimes exasperating.  Lately it has been more exasperating.  Last year was so exasperating that not one of our new hives managed to survive even the summer.  We strongly suspect the problem was the queens.  When they arrived last year, the queens were so small we could barely distinguish them from their attendants. (Yes, queen bees have attendants.) In hindsight, we question the regal stature of those “queens.”  So this year, we ordered three new bee packages from a different supplier.

Two months after installation of this year’s packages, two hives are ready for second hive body boxes.  The third hive shows very little activity.  Mr. Beekeeper inspects the hive and finds very little brood and a dwindling number of bees. Exasperating.

But lo and behold! A queen cell!  How exciting!

The hive has recognized its problem and has chosen to raise a new queen. Why last year’s hives did not do the same is a question worth pondering. Why this hive needs to re-queen is another question.  Did the queen die?  Was she ill? Was she…gasp…old? Was she just a poor lay-er?  (This reminds me of my sister and her poor laying hens.  She shrieked death threats at them and the very next day, they resumed laying.)

Queens cells take eight days to hatch from the time the cell is capped.  About ten days after spotting the capped queen cell, we take a peek inside.  The queen cell is now empty.  We look for the queen.  This is sort of like Where’s Waldo–find the one bee that is longer than the hundreds of other bees.  Fortunately, the bees are only on a couple of frames, one of those frames is exclusively capped honey, and the other frame is where the queen cell was.  And we find her!

Now we wait.  The new queen needs two weeks to get established.  She must exit the hive for mating flights with drones.  There are drones visible in the hive and a few drone cells waiting to hatch.  There are also plenty of drones buzzing around the other two hives.  Our queen will not lack opportunity. And then she must get busy laying eggs.  In about three weeks we will peek inside again, hoping to see lots of new brood cells.

Here’s hoping we will still be excited in three weeks.

Spring SnowBees

There are 58,000 bees in the basement.

58,000 bees

58,000 bees

Snowy Chives in March

Snowy Chives in March

It’s the end of March. We turned the clocks to “summer time” two weeks ago.  Last week the vernal equinox made it officially spring.  Today we took delivery of four new packages of bees.

And it’s snowing.

At 9 a.m.  we head to Snyder’s Apiary in Whitehall, windshield wipers brushing snow from the glass. The car thermometer reads the outside temperature as 28 degrees.  Out at the apiary, the countryside is dusted white and snow “flurries” blow sideways in the wind, whipping our faces.  Beekeepers in winter coats greet one another with snide remarks about the great weather.

Why, you ask, are we getting bees when it is so cold outside?  Because one orders bees weeks in advance and the Snyders drive down to Georgia on a scheduled day to pick up the orders in a truck.   The bees have arrived.  We have already paid for them.  We must take them home.

snowbees 2 w beeguys

BeeMan and Junior BeeMan carry 16 lbs of bees to the car.

Junior Beekeeper comes with us this morning.  He helps carry the bees to the car.  They take up the entire back seat.  A few Klingons (“cling-ons”) try to hitch a ride too, but without the advantage of the warm group hug in the bee boxes, they won’t last long.  Sure enough, back home, when the boxes are removed from the car, a few motionless bees remain on the back seat.

No, we don't buckle them in.

No, we don’t buckle them in.

Alas, it is too cold to put the new bees in their hives.  Tomorrow will be better and the rest of the week will be perfect, with temps in the 50’s and sunshine.  So for now, 58,000 girls (and a very few guys) will have a little sleepover in the mancave.

Today's conditions for the snowbees.

Today’s conditions for the snowbees.

Conditions downstairs are almost ideal.  The mancave is heated  only  by a woodstove.  With no fire going, the temp is 55.  And the only light is from the door.  With the overhead lights off, it is both cool and fairly dark.  A few bees buzz at the screens of the boxes but, for the most part, the bees quietly huddle around the caged queen and a can of sugar water.

They can’t get out.  Really.

4 pounds of bees

4 pounds of bees

The bees can stay in the package boxes for up to five days.  That includes the time they spent traveling from Georgia. Today is probably day three.  If this cold weather were to last all week, we would have a dilemma on our hands.  Fortunately, it won’t, so we don’t.  BeeMan has enough to do prepping the hives for the new residents. Cleaning out the Room of Outer Darkness to install a temporary apiary is not on the Honey Do List.

Tomorrow the bees will be installed in their new homes–outside in the bee yard where they belong.  Maybe then we can pronounce the beginning of spring.

The daffodils are trying to bring Spring.

The daffodils are trying to bring Spring.